卡片开发
卡片是指可展示在首页上的内容,卡片由开发人员开发。
以下展示卡片前端开发示例,分为平台(HZERO)和项目两种。
卡片的权限在角色管理的工作台配置中设置。
1. 平台开发
平台开发有两种开发方式,一种是在hzero-front/routes/Dashboard目录下开发,一种是通过 customize 进行跨模块开发。
因为卡片是按照需求来开发的,所以应在有对应需求的模块下进行开发,所以建议使用 customize 进行跨模块开发。
1.1 customize 跨模块开发
对 customize 的详细介绍,见 customize 跨模块开发方式
1.定义卡片 customize
// 主模块 卡片的 customize
/* hzero-front/src/customize/cards.js */
import { isFunction } from 'lodash';

import { mapCustomize } from 'utils/customize';

/**
 * 如果 卡片存在 则加载卡片
 * 否则 返回 null
 * @param cardCode
 * @return {Promise<null|*>}
 */
export async function loadCardAsync(cardCode) {
  if (mapCustomize.has({ module: 'hzero-front', feature: 'cards', key: cardCode })) {
    const layout = mapCustomize.get({ module: 'hzero-front', feature: 'cards', key: cardCode });
    if (isFunction(layout && layout.component)) {
      const card = await layout.component();
      return card;
    }
  }
  return null;
}

export function setCard(cardConfig) {
  // TODO: 判断是否需要检查 重复设置的问题
  mapCustomize.set({
    module: 'hzero-front',
    feature: 'cards',
    key: cardConfig.code,
    data: { component: cardConfig.component },
  });
}
2.使用卡片的 customize
/* src/utils/router.js */
// ... 其他代码
// 增加 customize 的引入
import '../customize';
// ... 其他代码

/* src/customize/index.js */
// 引入 工作流模块 的卡片配置
import './customizeCards';

/* src/customize/customizeCards.js */

// 引入 存储 卡片配置的方法
import { setCard } from 'hzero-front/lib/customize/cards';
// 引入 家在 model 的包装方法
import { dynamicWrapper } from '../utils/router';
// 设置 编码为 Workflow 的 卡片
setCard({
  code: 'Workflow',
  component: async () => {
    return dynamicWrapper(window.dvaApp, ['cards/workflow'], () =>
      import('../routes/Cards/Workflow')
    );
  },
});

// 卡片开发 (基于 dva 及 hzero-ui)
// 卡片组件
/* src/routers/Cards/Workflow/index.js */
// 该卡片的 model
/* src/models/cards/workflow.js */
export default {
    namespace: 'cardWorkflow', // 卡片的namespace
    // ... 其他代码
};
// 该卡片的 service
/* src/services/cards/workflowService.js */
1.2 在Dashboard目录下开发
1.开发卡片
在 hzero-front/routes/Dashboard/Cards 目录下开发卡片代码;
TestCars.js:
import React from 'react';
import { Card } from 'hzero-ui';

// 如需使用model,可以自行配置,和普通页面加载model的方式无异
export default class TestCard extends React.Component {
  render() {
    return (
      <Card
        bordered={false}
        bodyStyle={{ padding: 0, overflow: 'hidden' }}
        title="测试卡片"
      >
        test
      </Card>
    );
  }
}
2.引入卡片
在 hzero-front/routes/Dashboard/Workplace/index.js 文件中的 LOCAL_CARDS 引入上一步开发的卡片代码;
const LOCAL_CARDS = [
  ...
  {
    code: 'TestCard',
    component: async () => {
      return dynamicWrapper(window.dvaApp, ['dashboard/cards'], () =>
        import('../Cards/TestCard')
      );
    },
  },
];
1.3 新建卡片
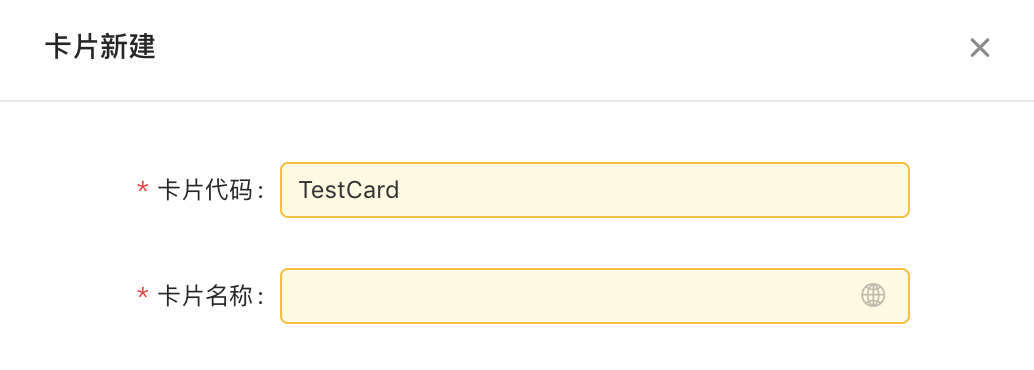
在 卡片管理功能新建一条数据,新建数据的卡片代码字段必须是和LOCAL_CARDS``LOCAL_CARDS中引入的卡片代码中的 code 字段一致;
比如: 上一步中,引入的卡片 code 字段为 TestCard,则新建卡片数据时,卡片代码字段为 TestCode。

1.4 配置卡片
新建成功后,前往工作台页面:设置布局->卡片设置勾选对应的卡片。
2. 项目开发
基于 0.9.x 、 0.10.x 或更新的版本。
1.1 开发卡片
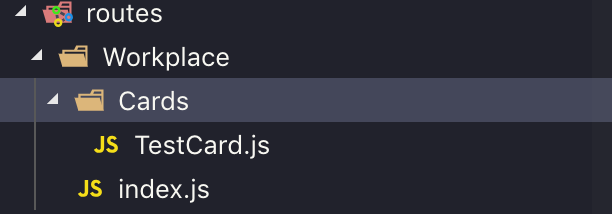
在某个服务下,开发工作台页面,例如:

Cards 下存放卡片代码,例如 TestCard.js。
TestCars.js:
import React from 'react';
import { Card } from 'hzero-ui';

// 如需使用model,可以自行配置,和普通页面加载model的方式无异
export default class TestCard extends React.Component {
  render() {
    return (
      <Card
        bordered={false}
        bodyStyle={{ padding: 0, overflow: 'hidden' }}
        title="测试卡片"
      >
        test
      </Card>
    );
  }
}
index.js:
import React, { Component } from "react";

import HzeroWorkplace from "hzero-front/lib/routes/Dashboard/Workplace";

import { dynamicWrapper } from "utils/router";

const cardsConfig = [
  // 有多个卡片就配置多个对象
  {
    // 卡片代码
    code: "TestCard",
    component: async () => {
      // 加载卡片代码
      return dynamicWrapper(window.dvaApp, [], () =>
        import("./Cards/TestCard")
      );
    },
  },
];

export default class Workplace extends Component {
  render() {
    return <HzeroWorkplace cardsConfig={cardsConfig} />;
  }
}
2.2 加载工作台model
开发完工作台和卡片代码后,接下来需要加载工作台的model,在 models 目录下添加如下配置:

workplace.js:
import workspace from 'hzero-front-hpfm/lib/models/workplace';

export default workspace;
注意:1.0.1版本的前端请从
hzero-front中引入workplace: import workspace from ‘hzero-front/lib/models/dashboard/workplace’;
1.1.x版本的前端请从
hzero-front中引入workplace: import workspace from ‘hzero-front/lib/models/workplace’;
2.3 配置路由
配置路由,覆盖平台的工作台路由。
module.exports = [
  {
    path: '/workplace',
    component: 'Workplace',
    models: [
      'hpfm/workplace',
    ]
  },
];
2.4 配置卡片
接下只需去卡片管理和工作台做相关配置即可,操作方式与平台的操作相同。
3. 配置报表卡片
注意:基于 1.1.0版本的 hzero-front-hpfm 和 hzero-front。
1.1.0 版本推出报表卡片功能,通过在卡片管理对卡片进行配置,将图形报表数据转化为图表在工作台上以卡片样式进行展示。可以对多个图形报表分别进行卡片配置,方便查看。注意:报表卡片只能将报表类型为图形的报表进行图表展示。
3.1 建立图形报表
只有已经在报表服务中存在的图形报表才可以进行报表卡片的配置。关于建立图形报表的流程,详情见:报表平台
3.2 建立报表卡片
在卡片管理中点击新建按钮
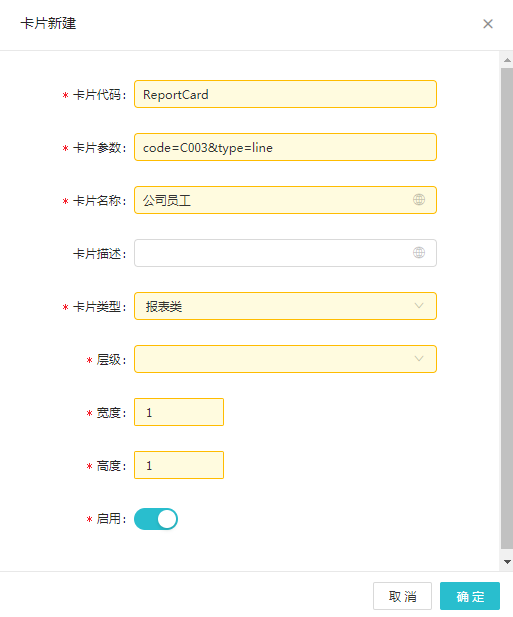
在新建页面中填写卡片信息

新建报表卡片有几点需要注意:
- 卡片代码:此项必须写为
ReportCard - 卡片参数:此项用于获取对应的报表数据,填写格式为
code=xxx&type=xxx。code=后的xxx为报表代码。type=后的xxx为图表类型。目前报表卡片所支持的图表类型和对应编码在下表。报表代码可在报表查询中找到报表对应的报表代码。此项后续可以更改。 - 卡片名称:此项显示在卡片标题上。后续可以更改。
报表卡片支持的图表类型
类型 柱状图 饼状图 折线图 散点图 编码 bar pie line scatter
注意:1.2.0版本新增 散点图 / 折线图 / 饼图。1.2.0版本之前只支持柱状图
关于卡片配置的详细信息以及分配卡片的具体做法,请点击:卡片管理
3.3 在工作台新增报表卡片
1.点击 
2.点击 
3.选择对应的报表卡片

4.点击  按钮完成新增。点击取消按钮可撤销新增。
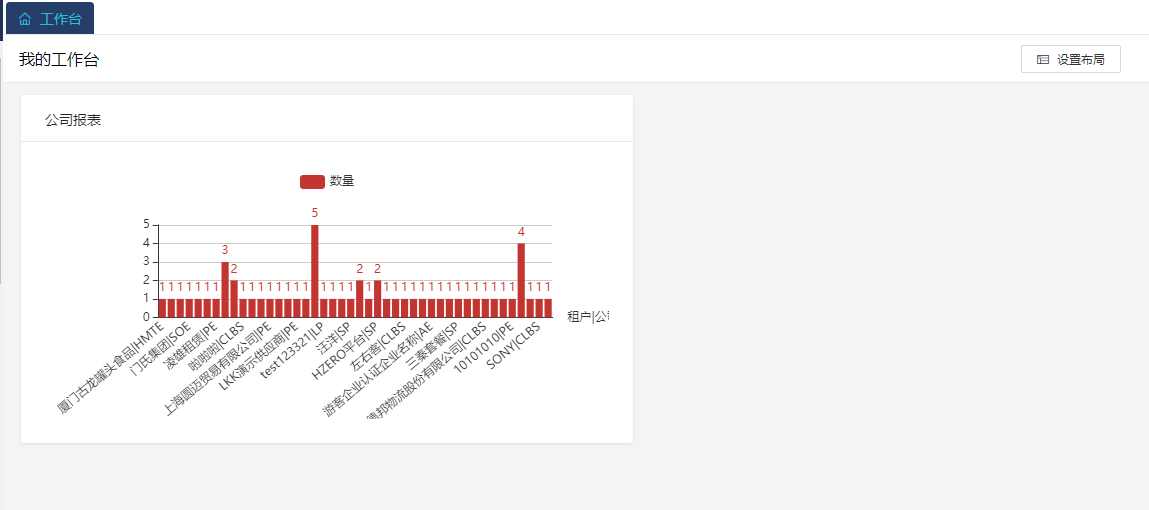
保存后就可以在工作台中见到这张报表卡片了

可以通过这个方法对多个图形报表进行配置,注意:报表代码不能相同。